
Dynamic Host Configuration Protocol, or DHCP, is used to provide quick and centralized management of IP addresses and other TCP/IP settings on your network. These are things like host IP address, subnet mask, DNS settings, default gateway address, and so on (I call these “IP configuration settings”). When you power on your computer, a DHCP server likely provides these IP configuration settings to you. Even if you don’t have a stand-alone DHCP server, your default gateway likely has its own DHCP server feature.
DHCP really makes network management a lot easier. DHCP eliminates the need for manually assigning IP addresses to our devices. And with this benefit, we decrease the chances of two devices having the same IP address. The following steps describe how DHCP works step-by-step.
Step 1: DHCP Dicsover
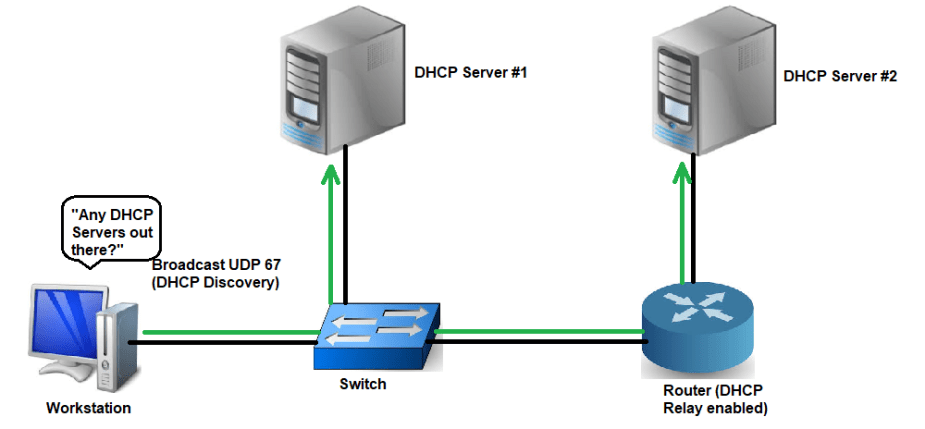
This first step is a discovery process performed by the workstation. The workstation here refers to the system that currently does not have an IP address. The purpose of this step is to discover any DHCP servers on the network that can hand out IP configuration settings. The workstation accomplishes this task by sending out a broadcast over UDP port 67 that essentially asks, “Hello, are there any DHCP servers available to help me?” This message is referred to as a DHCP Discover message. Importantly, it’s a great idea to have multiple redundant DHCP servers on your network. But, this raises an important question: Since routers don’t forward broadcasts, will we need to install a DHCP server on every broadcast domain? The answer is no. Routers can forward DHCP broadcast messages if they’re configured to do so. Features like “DHCP Relay” and “IP Helper” ensure that DHCP broadcasts can reach other subnets. A relay agent will take a DHCP broadcast and forward it through a router as a unicast transmission to the DHCP server on the other subnet.
Step 2: DHCP Offer
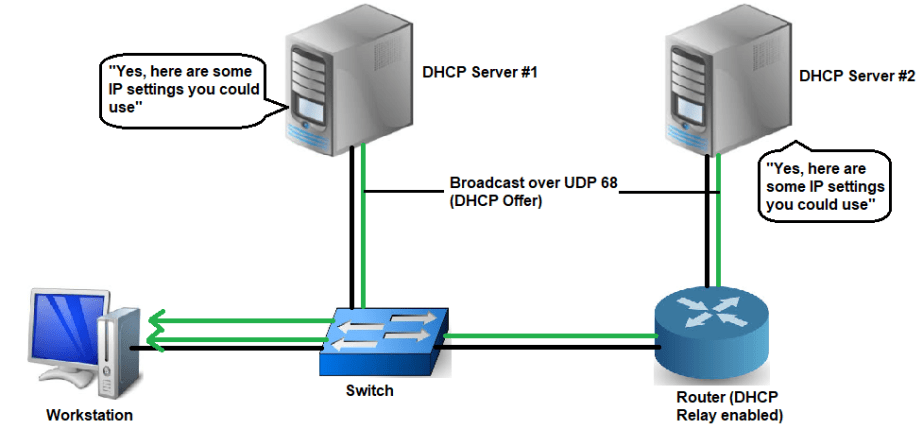
After step 1 is accomplished and one or more DHCP servers are discovered somewhere on the network, the DHCP servers all reply to the workstation with a broadcast offer to the workstation over UDP port 68. This broadcast contains available IP configuration settings. This message is called a “DHCP Offer.”
Step 3: DHCP Request
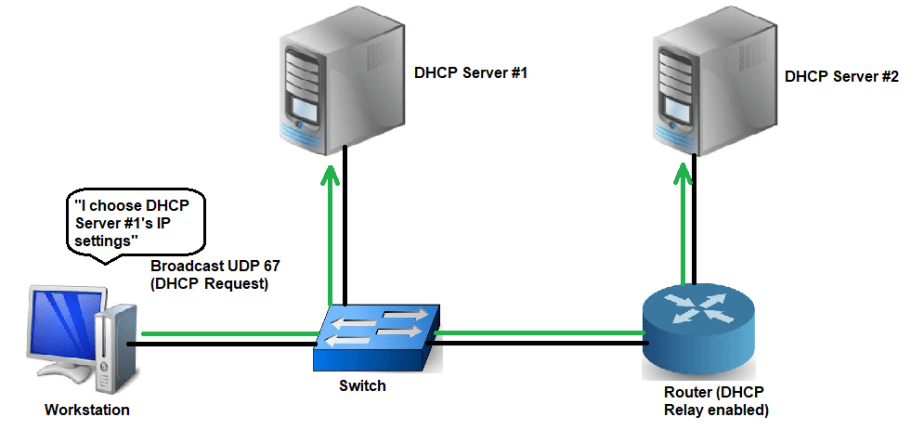
In this third step, the workstation receives all the broadcast offers in step 2, and picks one. Whichever IP configuration settings it chooses, the workstation sends another broadcast back out on UDP port 67. Every DHCP server receives this broadcast. This message is called a DHCP Request.
Step 4: DHCP Acknowledgement
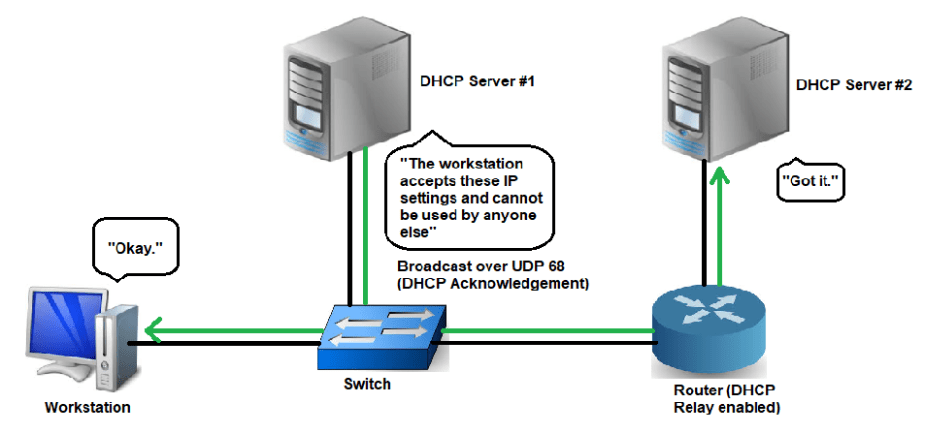
In this final step, the DHCP server that was responsible for the DHCP request responds with one last broadcast to the workstation and all other DHCP servers over UDP port 68. This DHCP Acknowledgement Message tells the other DHCP servers that the new IP configuration settings are owned by this particular workstation and cannot be reused for anyone else.
