Fluxion Is The Future! Fluxion is accurately just a Wi-Fi analysis tool that comes with a list of very useful penetration testing programs, such as Aircrack-ng, Aireplay-ng, Airodump-ng, awk, bully, curl, dhcpd, hostapd, lighttpd etc. It is a remake of linset by vk496, available on Github.
Unlike many other Wi-Fi analysis tools that use a dictionary attack to crack the Wi-Fi password, Fluxion relies on social engineering to fool the victim into revealing the Wi-Fi password. It does this by creating a clone of the real AP and redirecting the victim to a fake login page (captive portal) that asks for the Wi-Fi password. When brute-force and dictionary attacks fail to crack a very strong Wi-Fi password, we can use Fluxion to try an uncover it. It won’t matter if it’s a strong WPA2 password, Fluxion can uncover the password because it uses social engineering.
I am running Kali Linux version 2018.1 and I am using the Alfa AWUS036NHA wireless adapter.
The information provided on the cybersecurityman is for educational purposes only. I am in no way responsible for any misuse of the information provided. All the information here is meant to provide the reader with the knowledge to defend against hackers and prevent the attacks discussed here. At no time should any reader attempt to use this information for illegal purposes.
Step 1: Clone and Launch Fluxion
Clone the Fluxion git repository using git clone https://github.com/GiorgAtma/fluxion or you can try git clone https://github.com/wi-fi-analyzer/fluxion. Wait for it this to complete, then change your current directory using the cd fluxion command and then list out the files using the ls command. Type ./fluxion and press Enter.

If you notice any dependencies in the list that are not installed, you’ll need to install them. while still in ~/fluxion#, type ./Installer.sh and press Enter. Wait patiently as installing all the packages could take a while. Once that is finished, you can launch Fluxion using the ./fluxion command. You’ll be prompted with a security warning and then asked to pick a language.
Step 2: Scan for Target Network
Fluxion relies on Aircrack-ng big time for this attack to work. Fluxion will prompt you with a list of options to choose from. You can either scan all channels or scan a specific channel(s).
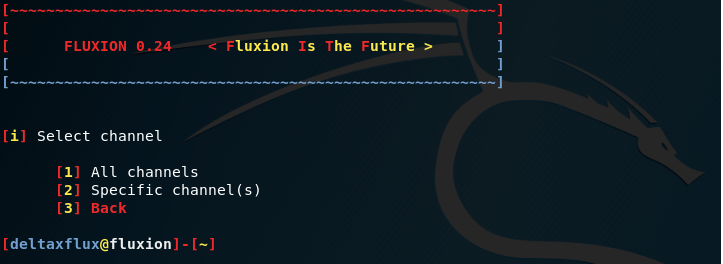
More likely than not, you won’t know the channel that the channel your home AP is broadcasting on; therefore, it’s wise to select option 1 to scan all channels. Otherwise, if you do happen to know the channel, you can narrow down Airodump-ng’s output to any networks on that specific channel. I chose all channels
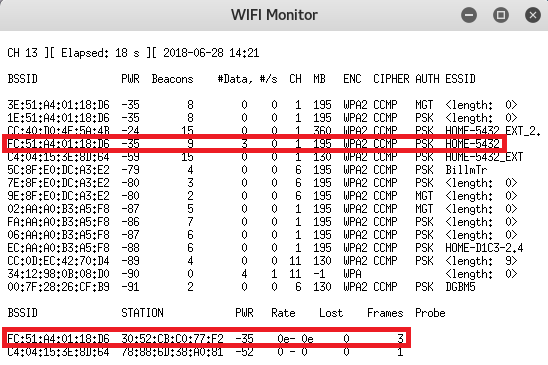
This opens the WIFI Monitor window, which is really just the Airodump-ng output. Select your network. I’ve highlighted my network I will be using in red. Notice at the bottom that we can see a client (me) connected to the target network. This is critical. Without any clients associated to the target network, this attack will not work. Once, you’ve identified the network you want to attack, type ctrl+C
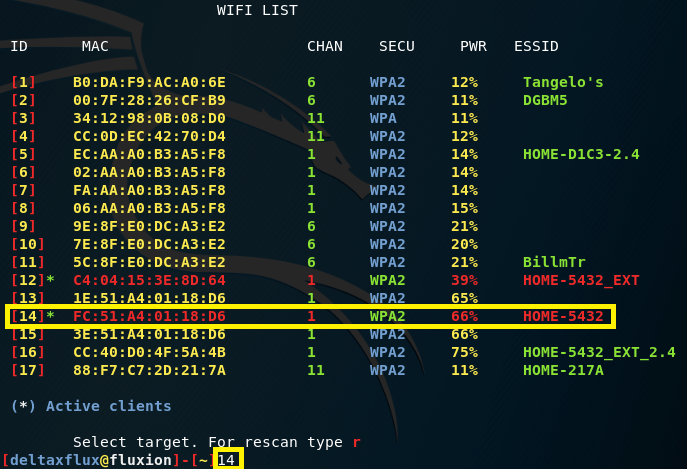
Now, you have to choose the network Fluxion’s WIFI LIST window. All you need to do is re-identify your network by typing the ID number and pressing Enter. Notice how the networks with clients currently associated with them have an “*” next to their ID number.
Step 3: Select Attack Option
Next, Fluxion lists a set of attack options to choose from. You can clone a fake AP of your network using Hostapd or Airbase-ng, OR you could bruteforce the network password using Aircrack-ng. This is something I already demonstrated here. For this demonstration, we’re going to use option 1: FakeAP – Hostapd. Type 1 and then press Enter.

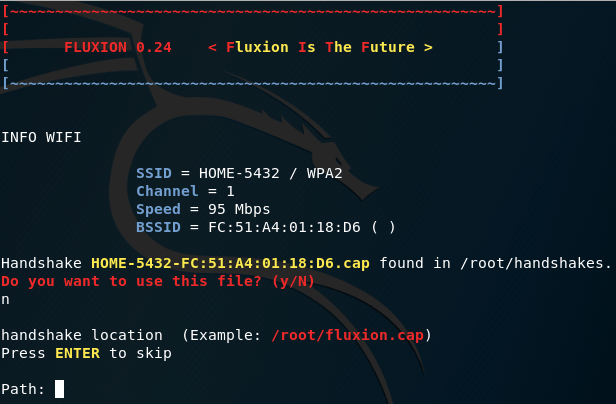
You’re now asked to specify a path to store the WPA handshake when it’s captured (ignore the fact that I already had a previous WPA handshake capture). You can skip this option by pressing Enter. This will store the WPA handshake capture file in /root/handshakes. You can later open this file in Wireshark and review it.
Now, you can choose the way in which you capture the WPA handshake. You can choose Aircrack-ng or pyrit. I chose Aircrack-ng.

Step 4: Deauth
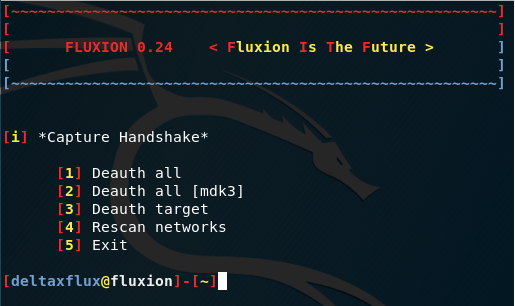
The next step is to deauthenticate the client(s) off the target network by sending mass deauth frames. You can choose a mass deauth, which will deauth EVERYONE off the target network, or you can choose a specific client to deauth. Whatever option you choose does not matter if it’s your network. I chose option 1: Deauth all. Type 1 and press Enter.
Step: 5: Capture the WPA Handshake
Airplay-ng will send deauth frames onto your network. This will deauth clients off your AP. Once the client re-connects to the network, we will capture the WPA handshake and store it in /root/handshakes. You know that you’ve captured the WPA handshake when the “WPA handshake: [MAC address of AP]” appears in the top right window.
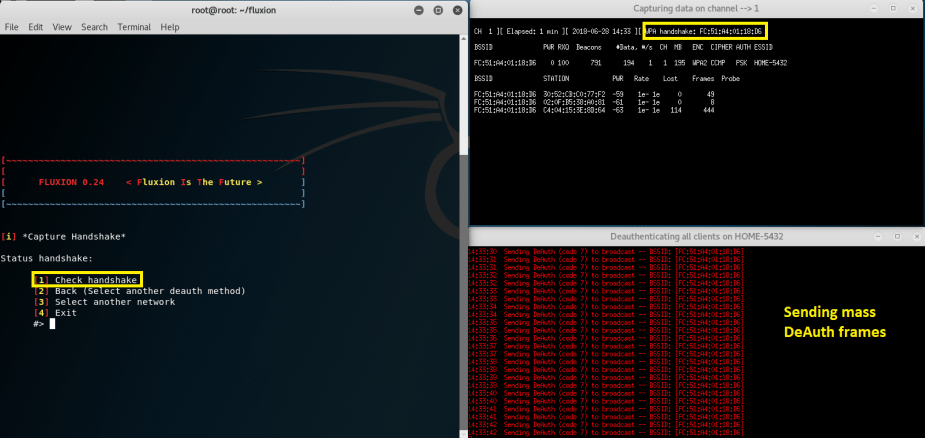
Now, type 1 and press Enter in the Fluxion window to check the handshake. Then, you can type 1 and press Enter for Create a SSL certificate.

Step 6: Create Rogue AP
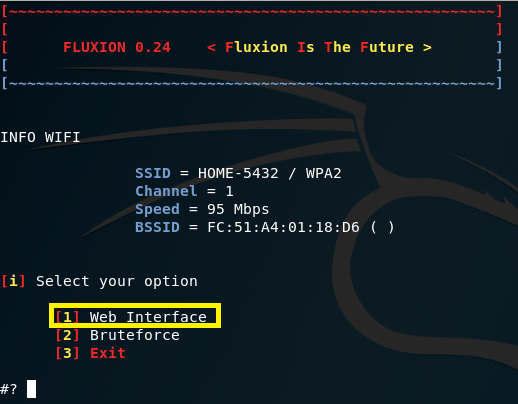
The next step is to clone your AP. This fake AP will NOT have Internet connection, so do not expect the client to be able to surf the Web. Choose option 1: web interface by typing 1 and press Enter. Again, you COULD choose option 2 if you wanted to bruteforce the password, but we’re aren’t doing that in this demonstration.
You’ll now be prompted with a list of login pages (captive portals) to choose from. Some of these aren’t convincing, but some could definitely fool a computer-illiterate person. I chose option 26, which is an English version of a Netgear captive portal.
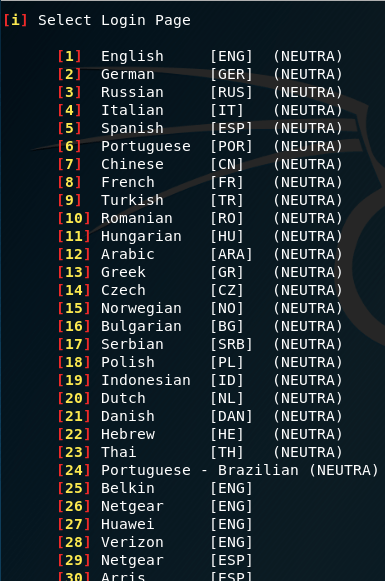
Type the number of the login page you want to send to the client and press Enter. The fake login page will use the lighttpd program.
Step 7: Wait for the Client
Now, 4 windows will pop up. The DHCP window uses the dhcpd (isc-dhcp-server) to respond to dhcp requests from the client in order to lease out an IP address. The FAKEDNS window will serve as a fake dns server in order to sinkhole any of the client’s web searches to the fake login page. The Wifi Information window will display when the client has connected to the fake AP. And, the Deauth all window will use the mdk3 tool to jam the real AP in order to force the client to connect to the unencrypted, fake AP.
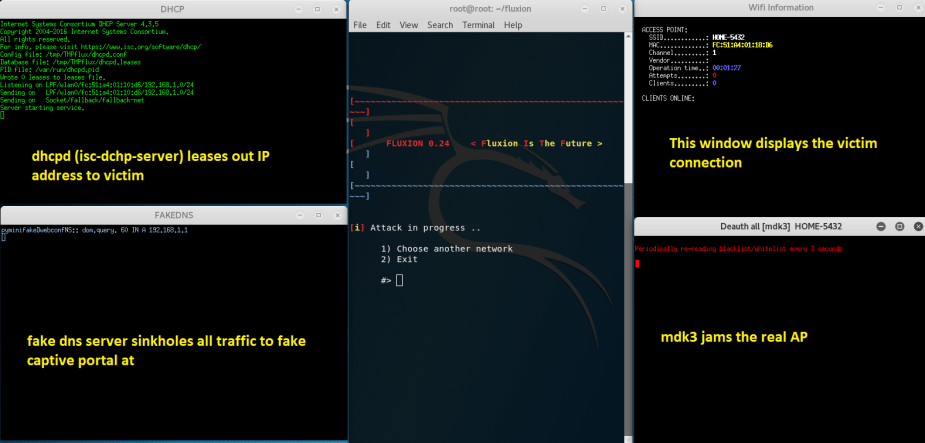
Once the client connects to the fake AP, the windows start to list out information, as you can see below. The client was leased an IP address at 192.168.1.100. The client was also redirected to the fake login page at http://www.msftconnecttest.com or 192.168.1.1.
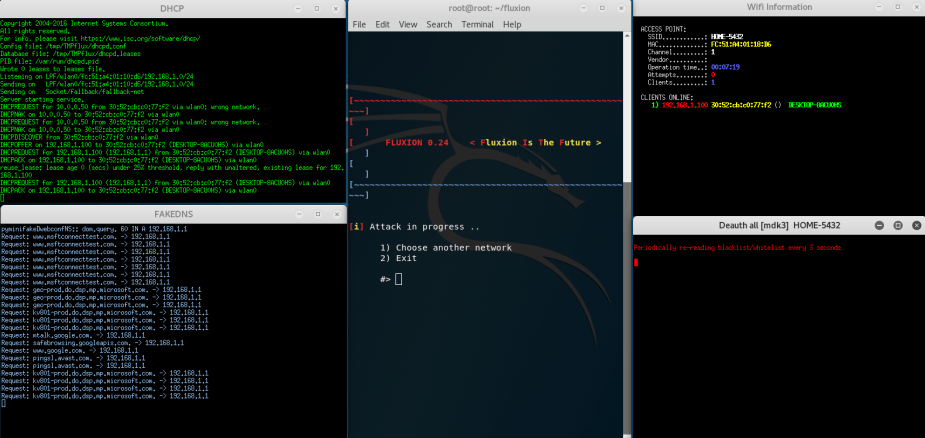
I understand the above image might be hard to read. If these windows are hard for you to see, you can review them below instead.
What happens on the client’s screen is that they are redirected to the fake Netgear captive portal in which they are prompted to enter the correct Wi-Fi password in order to re-connect. If they enter an incorrect password, Aircrack-ng will detect this is not the correct password and request that the client re-enter the password.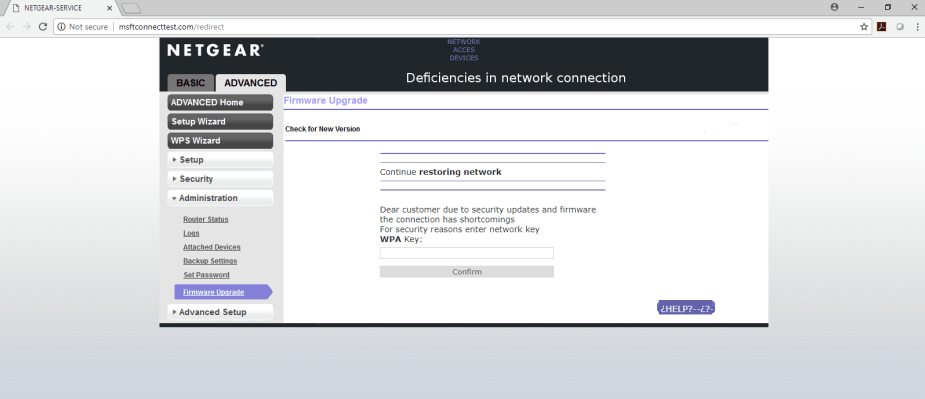
once the correct Wi-Fi password is entered, a message will display stating, “YOUR INTERNET CONNECTIVITY WILL NOW BE RESTORED.”

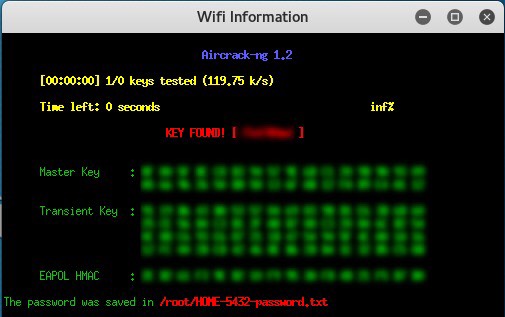
Fluxion will now stop the rogue AP, allowing the client to re-connect to the real AP. Aircrack-ng will then display the Wi-Fi password and save it in a .txt file for you to review.
Defense Against Fluxion
Obviously, any experienced cybersecurity professional or hacker will not fall for this attack. However, the same cannot be said for people who don’t have much knowledge about technology. Be cautious of portals or login pages that request a password. If it does not look like the usual captive portal, or if you’ve never even seen a captive portal in the past, that is a red flag. Navigate around the captive portal and try clicking on interactive elements. For example, the Netgear captive portal used in this demonstration uses a cloned Netgear captive portal that looks just like the real one; however, none of the sidebar menu options are clickable.
Having a strong Wi-Fi password does not defend against an attack like this because it relies on social engineering. If you give up your password, it won’t matter how strong it is.
